Week 8: CNC Milling
Part 1: Assignment
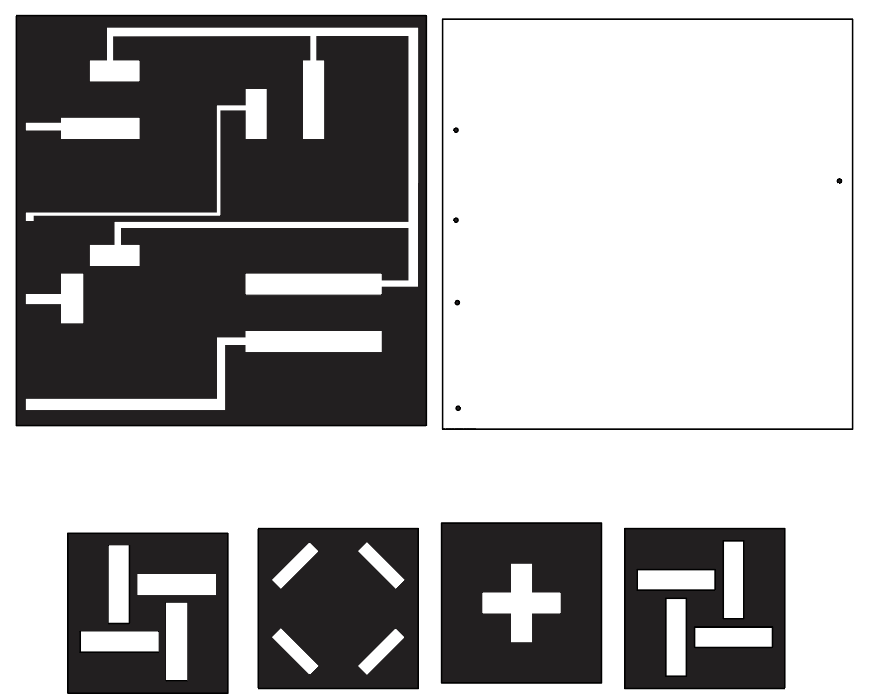
This week we had to make something with the CNC machine and post-process it. The file I had prepared a couple weeks ago was a cutout of Taiwan, but I wanted to try 2.5D milling, so I found an elevation map and added it as a canvas to my Fusion file, then traced a couple more outlines (& extrusions) to do a rough 2.5D elevation map of Taiwan's mountains.
In my Fusion file, I extruded the shell to be 13mm, the base was 3mm, the first layer of Taiwan is 5mm, and each successive elevation layer is +2mm. The overall dimension of the rectangle is quite small, at about 2x4cm (which in retrospect is too small). If I were to do this again, I would make the model larger, specifically adding a bit more margin of error between the edge of the shape and the edge of the rectangle (as the plaster went over a bit).
I had some difficulty cutting the foam to fit the CNC machine (I wanted to use the SRM-20), so I ended up using a mix of saws/box cutters/rulers & brute force.
Next I used the SRM-20, where I fiddled with the settings and consulted with the TAs to get the right settings/calibration. I used a 1/8" endmill, and chose to go for speed/fairly flat levels, since this was exactly what I'd designed (I was going for a topographical map look). On my first pass, I set the height of the foam to be the full 9cm, and this put the cut in the center (vertically) of the foam (more on this later).
To calibrate, I moved the spindle to the center of where my rectangle would be & lowered the spindle, then loosened the drill bit until it was just touching the foam. The first pass failed because the spindle kept hitting the sides of the rectangle in the foam (and it took way longer to cut), so I recalibrated and just set the height to be the 13mm of the shell. I am not sure why there is a deep recess around the shell, but I think it's fine.
Next I made the silicone mold using the 2-part BBDINO silicone mold. I ended up making a bit too much, especially since my milled piece was so small anyway. With my failed cut, I attempted to use some clay to put a shape in, then poured the remaining silicone in.
After waiting about 12 hours, my Taiwan mold was ready, but I think I waited too long to pour the silicone into the clay mold, and it was less well-mixed, so it never set. I poured a tiny bit of plaster into the mold, waited half an hour, and it was ready to go.

Part 2: Final Project Updates
I also did some work to try to make the base less wire-y, and I'm planning on pseudo-milling a PCB board, except the board is just a couple pieces of copper plates and holes to solder wires to from beneath, so that I can hide wires, etc. in a base. In the future, Bobby said I could send off a 2-sided PCB design to be manufactured, but if I can mill out the copper, this would certainly be an improvement.
I also designed the base so that each of the four slots can only be turned on by a specific piece (in any of the 4 orientations/rotations). This was one of my stretch goals--I will also want the figurine part of each piece to be detachable, so that users can swap out which figure corresponds to which square/slot in the base (useful if they want certain switches to correspond to different locations in their room, for instance).